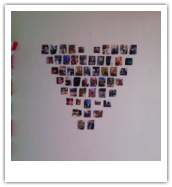
 1. Photo Collage You can put anything you want here. Photos of friends, famous people, clothes, anything that inspires you. Just got through your photos and choose some that make you happy :) I made mine into a heart shape, but you can do whatever you want.  2. Posters Put heaps of posters on your door! it looks really cool and you can use any sort of posters you want.  3. Put stuff on a photo frame This is very easy and helps to organises tables. It adds a clean touch to your table. Just put a photo frame down and put whatever you want on it.  4. Use a tub to store your extra blankets This is very easy. All you have to do is get a white tub and put your spare blankets inside!  5. Hang your clothes for the next day on a stand. I got this from Ikea. It was very cheap and it looks great in my room. you can put whatever you want on it. Hope you guys enjoyed this post, don't forget to like and comment on this post. I will be taking requests, so if you have any ideas, comment them below, or use the contact page at the top.
Since my hair is very thin and short, when I do a bun it's really small and doesn't look that nice. but with this method you can easy make your bun bigger, with only your hair, hair ties and bobby pins (if you need them) 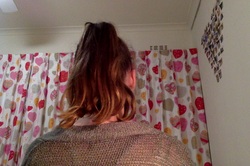 Step 1 So first you need to put your hair into a high pony tail. 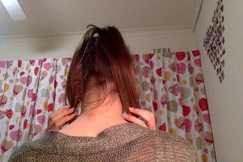 Step 2 We are now going to be doing a fish tail braid. So to do this split your hair into two pieces. 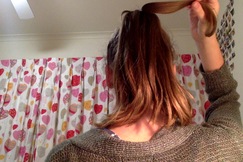 Step 3 Then get a small piece of hair from one side of the two pieces 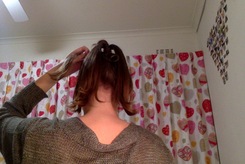 Step 4 Take the small piece and put it onto the other side. Make sure you keep the piece secured. the you want to do the same thing, but from the side you just put a new piece of hair in. 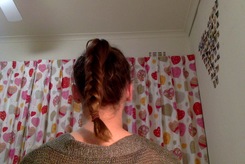 Step 5 Repeat until you have done all your hair. 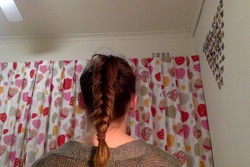 Step 6 Pull the braid to make it really big. 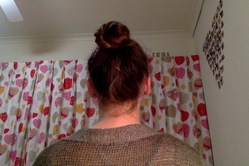 Step 7 Put the braid in a bun shape like you normally would. use a hair tie and bobby pins to secure the plait. Hope this helped you guys! Sorry I uploaded this a bit late.
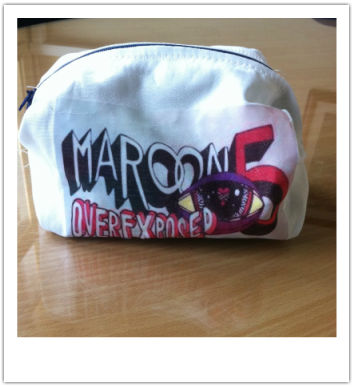
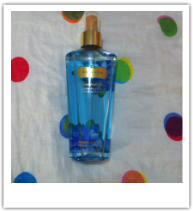
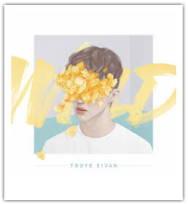 1. Wild by Troye Sivan This has been my favourite album this month and I've listened to it almost every day 😁I also watched the Blue Neighbourhood videos and they are really good too. 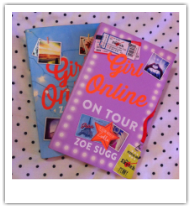 2. Girl online by Zoe Sugg I read this book in literally one day it was that good! It is only $14, which is a pretty good price. There is also a second one which is really good too. 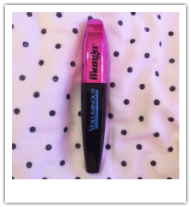 3. L'oreal Manga Mascara This mascara is really good and I use it every day! It costs about $20, so that isn't a bad price.  4. Red Bubble This site has a lot of things you can buy, with lots of different designs. Phone cases, shirts, pillows , pretty much anything. You can find things with your favourite youtubers and bands on them. I have also bought my friends things from this site and they look very professional. 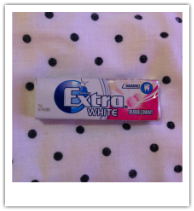 5. Extra white bubble mint gum It tastes good and freshens your breath at the same time! 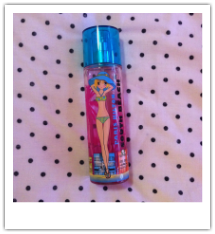 6. Paris Hilton South Beach Body Spray This smells really good and was only $10! 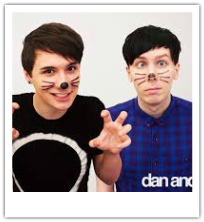 7. Dan and Phil I only just started watching their videos this month and I am obsessed! I really recommend their channels. 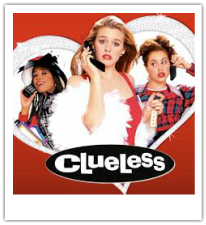 8. Clueless I LOVE this movie and have watched it a few times this month. If you haven't seen you have to watch it! 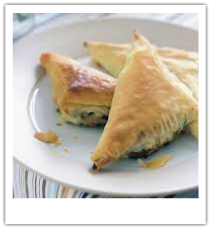 9. Spinach and ricotta triangles I really really like these. I could eat a lot of these they are that good. (I didn't take this photo by the way) Hope you guys enjoyed my favourites for this month! I will be trying to do these monthly. Just wanted to let you all know that the pencil cases I made a few weeks ago are for sale. Not the specific ones in the post, but you can get a custom design for only $7! So if you go to my school, you can contact me and I can make you one.
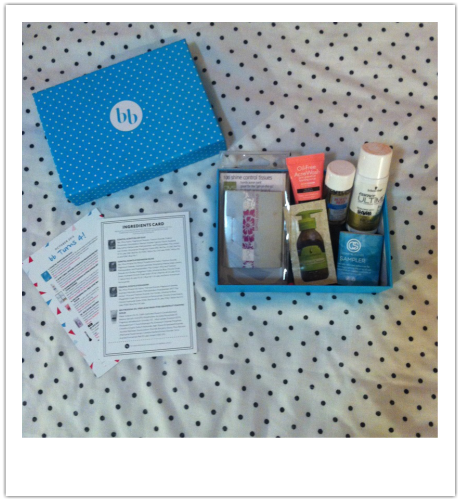 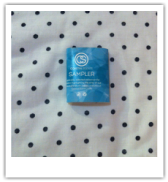 1. Coastal Scents Blush Duo When I opened my bellabox sadly one side of the blush had leaked into the box. But I could still test it. One side of the blush was very pigmented and was a copper sort of colour. The other side was a more rosy pink colour. I think I would use the pink one more, as the copper one is too much. I give it a 5/10 as the quality isn't that good. 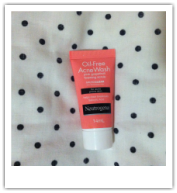 2. Neutrogena Oil-free Acne Wash Pink Grapefruit Foaming Scrub I already had this at home and I really like it. It cleanses your face well and it smells just like grapefruit. I give it a 10/10 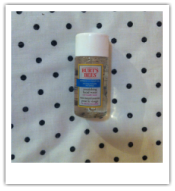 3. Burt's Bees Intense Hydration Nourishing Facial Water When I tried this my face burned slighly. It wasn't that effective either. But it smelt really nice. I give it a 2/10  4. QVS Shine Control Tissues The packaging is great and I like how there are a lot of sheets in this sample. The product itself is very good and removes a significant amount of shine. I give it a 10/10  5. Macadamia Natural Oil Luxurious Oil Treatment This smells really good! I love how soft it makes your hair feel. It also helps to defrizz your hair and that is always helpful. I give this a 9/10 I also got a Swarzkopf Shampoo, but not the conditioner. So next month I will have an extra review next month for the shampoo and the conditioner. This month the score out of 50 is 36/50. In this month's box I also got a $20 off voucher for the bellabox website, because it is their 4th birthday!
Hey guys, just want to let you all know that I haven't tried this before, so it might not look the best. What you need: -White Face paint - Orange Face paint - Black Face paint - Blue Face paint - Translucent powder/white eyeshadow - Mascara - Eye liner - Sponges - Brushes -Black Clothing -A flower crown -A glue stick 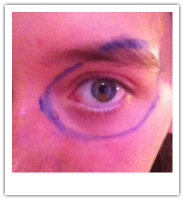 Step 1 Draw an outline around your eyes with your blue face paint. 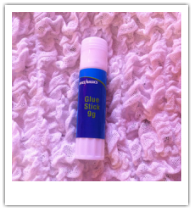 Step 2 Prime your eyebrows with the glue stick before you start applying face paint. 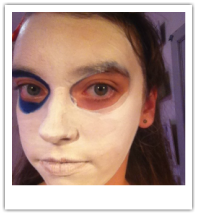 Step 3 Cover your face with white face paint, besides the blue outlines you made before. Make sure you wet the face paint before applying it. Then set it with white eyeshadow or translucent powder. 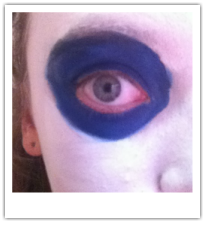 Step 4 Next you want to get your blue face paint and fill in the circle you just made. You can use your black to ombre it if you want. This will add some more shadows to your face, making it look cooler. 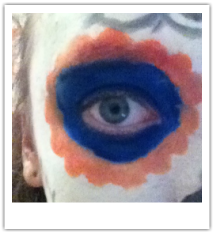 Step 5 You now can take you orange face paint and do some half circles around your face. Then fill them in. 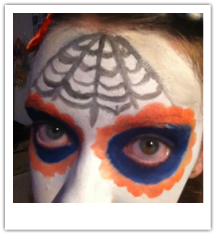 Step 6 Now for the fun part. This is when you get to decorate you face with whatever you want. I did a spider web on my forehead and a flower on my chin. 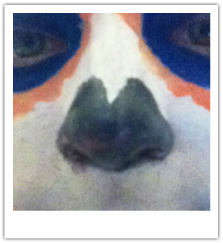 Step 7 Now outline your half circles from earlier as well as making your nose into a skull nose. Use the black face paint and paint a circle. Then draw 2 triangles above the circle. This will join together to make the nose.  Step 8 Now to do your mouth. Use the black face paint to draw lines over your mouth. Then paint another 2 lines from each corner of your mouth. Then add some lines onto the lines you just drew. This will create the look of a skull. 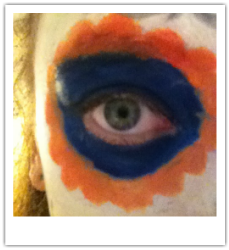 Step 9 Now set everything with the translucent powder. Now all you need to do is line your eyes and put on a bit of mascara. 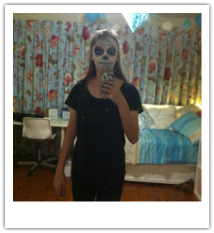 Step 10 Now find an all black outfit. I recommend a black dress, but mine didn't fit me anymore sadly. So I have a black shirt and leggings instead. Don't forget to wear a flower crown as well to finish the look. Hope you guys enjoyed this post! I've decided I will also be posting on Wednesday, as well as Sunday. Also thank you guys for 75 views last week!
 Just want you guys to know that I did not create the pattern for the pencil case, it was made by Anneorshine, but I thought I would share this idea. I thought of the iron on design myself. What you are gonna need: -White Fabric -Iron on Transfer paper -A printer - A sewing machine -A zipper - Scissors -An iron 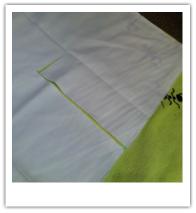 Step 1 First you want to cut your fabric to size (38.1 cm by 25.4 cm). 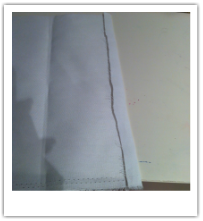 Step 2 Next you want to fold down the edges of your fabric to create a hem. Use an iron to make sure it stays down. 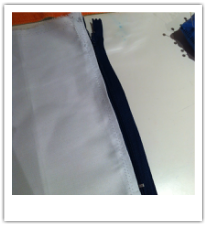 Step 3 Now you can pin and sew one side onto the zipper. Remember to use the zipper foot on your sewing machine.  Step 4 Then you want to print your out your design onto iron on transfer paper. When you print it out make sure it's backwards. Make sure it's the right size to fit your fabric. 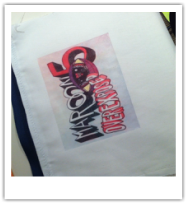 Step 5 Cut out your design and iron it onto your fabric. 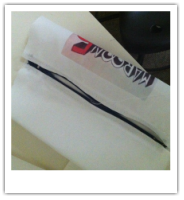 Step 6 Sew the other side of the fabric to your zipper. When you do this unzip the zipper so it's easier to sew. 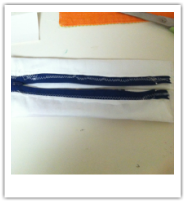 Step 7 Turn your fabric inside out and fold in the sides. Pin then sew the sides. After this turn your pencil case inside out and your done! Hope you guys enjoyed this DIY! I really enjoyed making this and I am very proud of it. You can Also use any sort of design you want, like below I have a pencil case I made for my Grandma. 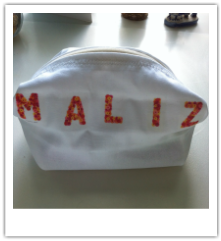 I found all these snacks at an Asian supermarket. I'm not exactly sure what country they are from, but I think they are from Japan.  Rainbow Cake This cake was really good! It was quite big, which was good. The cream inside was not too creamy, which I liked. It also looks really cool, so that's a plus. I give it a 10/10 there was nothing wrong with it. 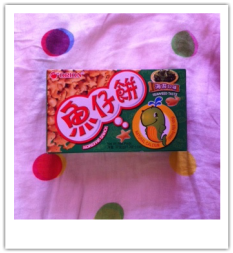 Seaweed taste chips These were a bit weird, but still good. They were shaped like whales and other sea animals. They tasted like seaweed, but they smelt weird, so that was bad. I still ate the whole packet though. I would give them a 7/10 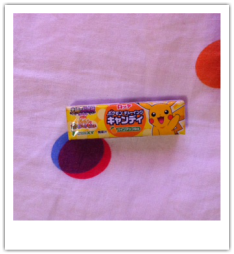 Pikachu Chewing Gum This was really good! The only weird thing was that the gum dissolved within five minutes, which was a bit disappointing. But they tasted like pineapple, like they were supposed too. The wrappers were wrapped with these papers that had pokemon on them, which was cool. Overall I give these a 9/10 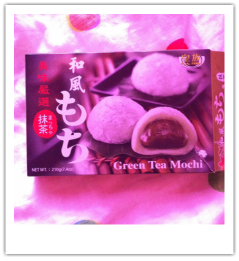 Green Tea Mochi At first these seemed okay, but once I tried them I realised they weren't. I really didn't like these. they were very squishy and the inside didn't taste that good. I would recommend another flavour, like strawberry. I give these a 0/10 Next week I am going to make a DIY pencil case so get excited! 😄
 1. Use a Magazine Holder to organise your school books. All you need to do is put a magazine holder on your desk and then you can put all your school books inside. You can also put your timetable on the side so you know which books you need to take.  2. Reward Jar This jar will help you reward yourself when you do well in a test or assignment. Put your goal grades on with post it notes, and write how much you will reward yourself if you achieve that grade. This will encourage you to study more, as you get a reward after. Put some money in and start making goals! 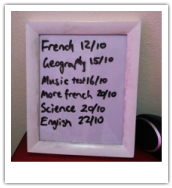 3. Photo Frame Assignment/Test list All you need is a photo frame and a white board marker. Write all your assignments and tests on there to help remind yourself to study. This is good so you won't forget about your tests and assignments. 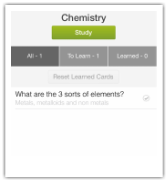 4. Flashcard App This is very handy and easy. All you need is to get the app Chegg Flashcards plus. You can then access your flashcards whenever you want! This is good because you can study at any time. This also helps the environment, as you're not using any paper.  5. Have a study playlist A study playlist is essential to making sure you concentrate when you study. The best place to find one is on Spotify. I use the playlist Deep Focus Piano Study Playlist. It relaxes you so you can study without distractions. Hey guys, I have decided I am going to be posting once a week. Every Sunday I will be posting something.
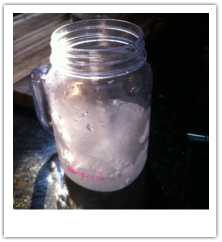
What you're gonna need: - Ice cubes - A blender - Pink Lemonade _ A fancy cup
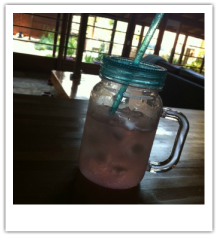
 What you're gonna need: -Apple Juice -Frozen Rasberries -Frozen Blueberrries -Pineapple -Ice -A Blender 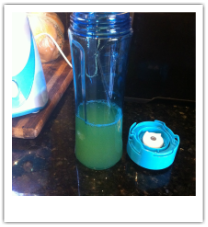 First you want to put your desired amount of juice into the blender. For this step, you don't have to use apple juice, but it goes with most fruits. 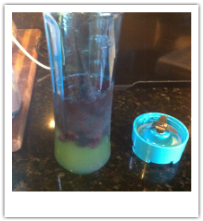 Next you want to put in your fruit. Frozen fruit is good to make sure your juice is cold. It also creates a nice texture. Then put in your other fruit, like my pineapple.  Next you want to put in your ice. Then blend it all together until there are no lumps. 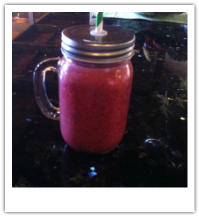 Put it in a fun jar and then your done! This juice is one of many different sorts of juices you can make. Next I will do a green juice.
 I thought I would start a little series where every month when I get my bellabox, I will review the products inside and rate them out of ten. This month I got six products. 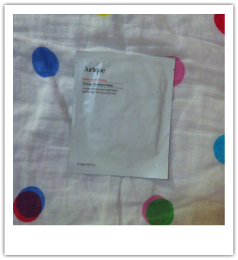 1, Jurlique Purely age-defying firming treatment mask Positives: It smells really good and has a lot of product on it. It is also quite fun to use. Minuses: It didn't really fit my face that well and it got in my mouth. Also the neck part is quite annoying. Its not terrible, but it's also not life changing. I give it a 5/10 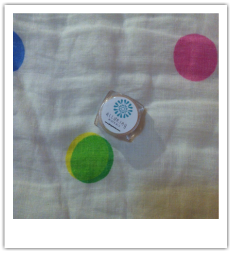 2. Alluring Minerals mineral illumiser Positives: It adds a nice shine to your skin and feels soft. Minuses: It comes off easily and it is messy. Overall I give this product an 8/10 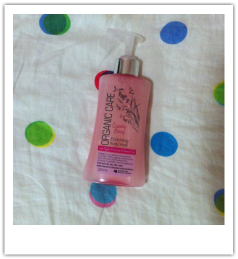 3. Organic Care body wash. Positives: It smells good and lingers for a bit. It is quite moisturising at first. Minuses: The moisture doesn't last all day and the scent doesn't either. But that is not terrible. Overall I would give it an 9/10 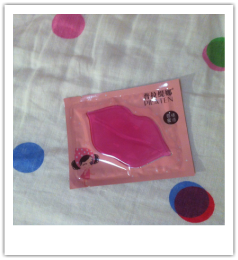 4. Pilaten Collagen lip mask Positives: It is very wet and soft, it feels like jelly, which is fun. It also sticks easily to your lips. Minuses: It breaks very easily and it is much bigger then my actual lips. It takes up the whole chin area. It is also not that effective. Overall I give this product a 6/10 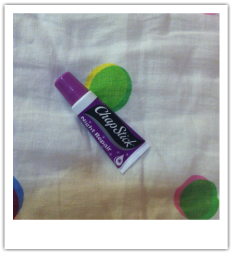 5. Chapstick overnight repair Positives: It's smooth and easy to apply. It feels soft. Minuses: It is not that effective and the softness only lasts for about an hour. As I used it more, the better it got, so it does make your lips softer. Overall I give this product a 6/10 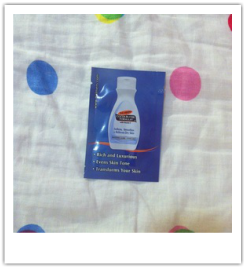 6. Palmer's cocoa butter formula with vitamin e Positives: Very moisturising and it smells really good. Minuses: It doesn't last that long. Overall I give this product a 8/10 All of the products got a score out of ten. I added them together to get 42/60. Every month I will do this and at the end of six months, I will rank them from the best to the worst.
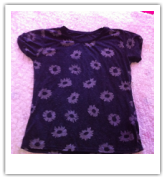
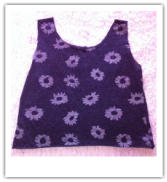
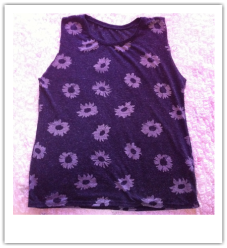 Step 1: Cut off the sleeves This will turn your shirt into a singlet. 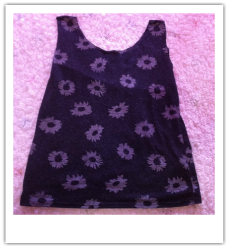 Step 2: Cut off the collar This will make the straps thinner, which will look better. 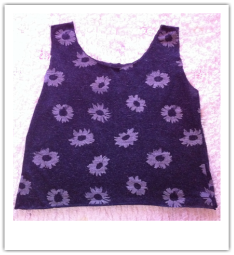 Step 3: Cut off a bit from the bottom Here you can customise how short or long you want your shirt to be. After this hem the edges. And now your done! This is a very simple DIY which can be done to any shirt you want. You can also make your design more advanced by making the straps into braids, by cutting the straps into three and braiding them together, but I decided to leave mine as it is.
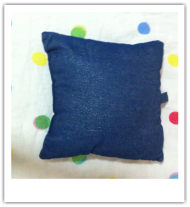
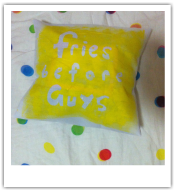
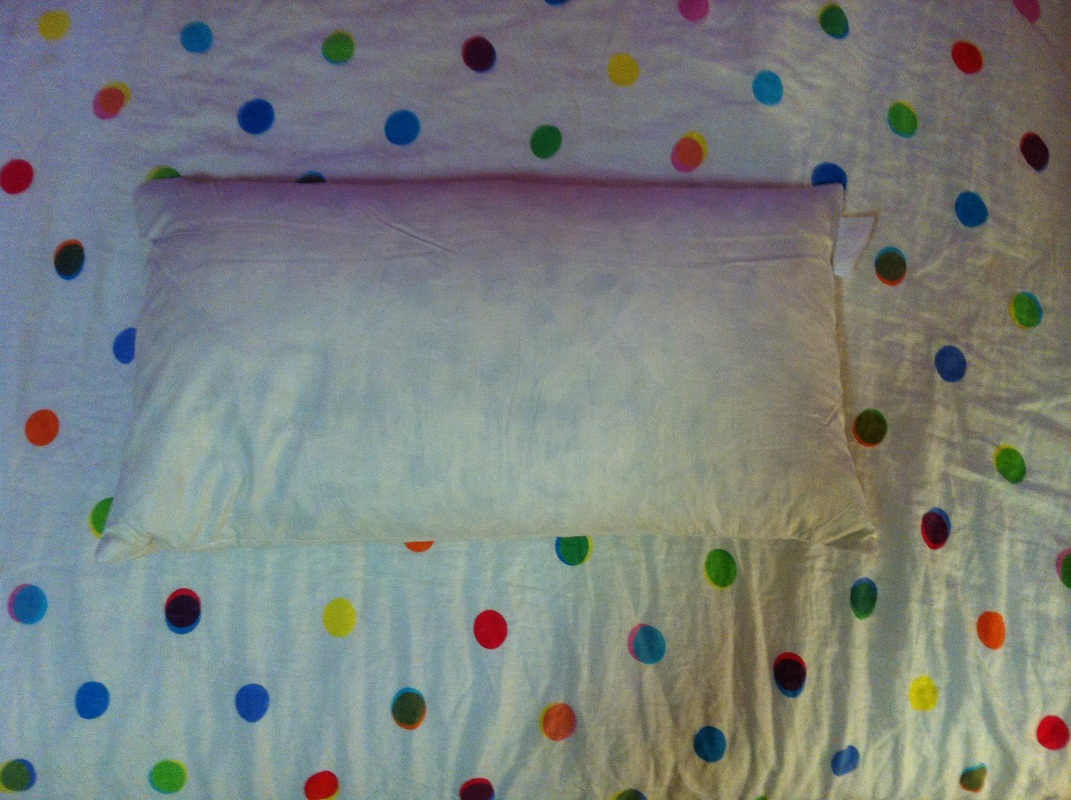
 Step 1 Make your pillow case or buy one. I showed how to make one on another post. 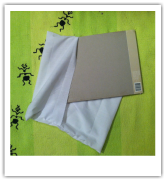 Step 2 Put some cardboard inside your pillow to make sure the paint doesn't go through. 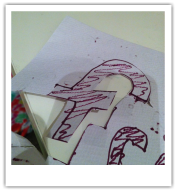 Step 3 Draw your letters on the cardboard and cut them out. 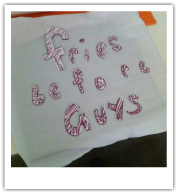 Step 4 Glue the letters in the places you want on your pillow. 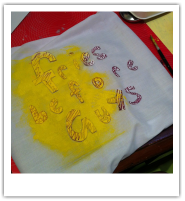 Step 5 Sponge on your desired colour ( I chose yellow) and make sure all the letters have been covered. 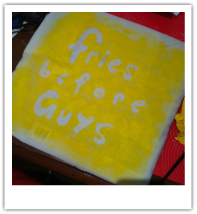 Step 6 Peel off the letters to reveal your design. After you do this, wait for the paint to dry and then put it on the pillow. Hope you guys liked this DIY and request any you want me to do in the future.
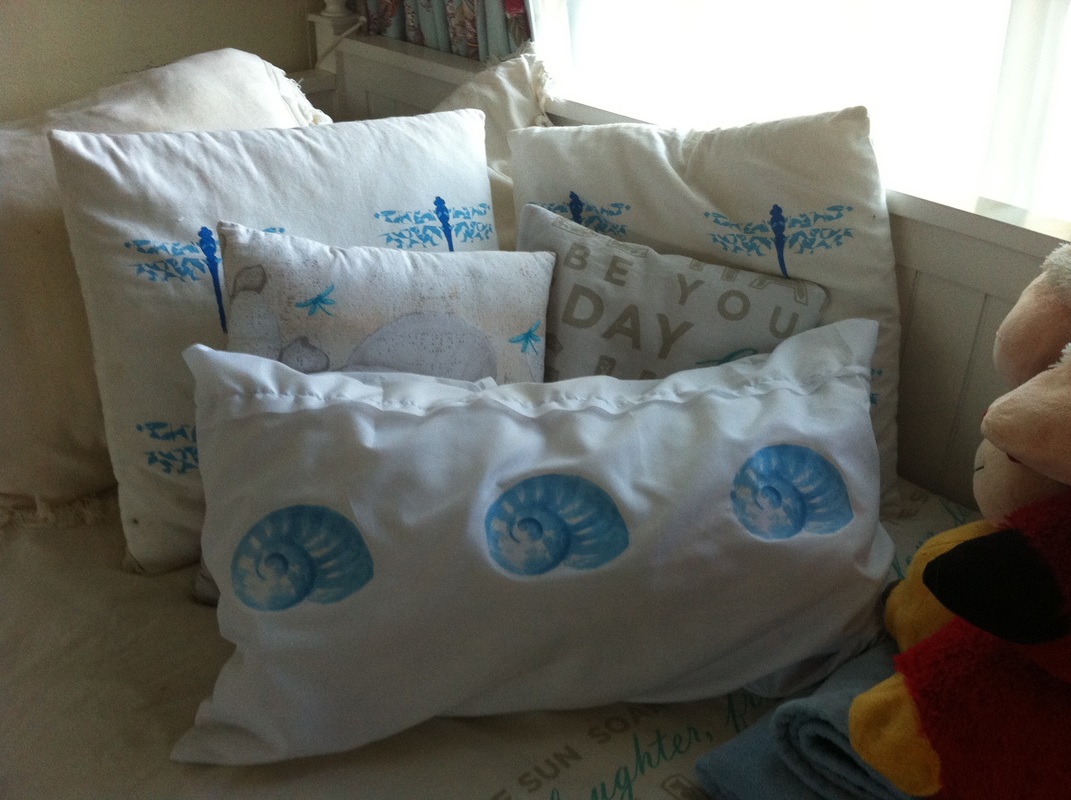
Hey guys today I am going to teach you how to make a DIY shell pillow case. The things you will need are: -Fabric -A Sewing Machine -Thread -Iron on transfer paper -A Printer -Scissors -Measuring Tape -Pins -A pillow  Step 1 Measure your pillow. Mine was 14 " by 26". Then double the length. To make sure it doesn't get too small when you sew it add 2 inches to the width and 8 inches to the length.  Step 2 Cut it out and make sure it's straight 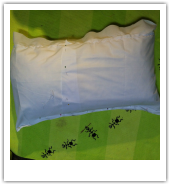 Step 3 Put your pillow on top of the fabric and fold into the middle. Then pin down the middle. 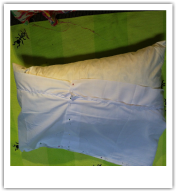 Step 4 Take the pillow out and pin both sides. Take out the pins down the middle. Then sew the sides. You can leave your pillow like this but I decided to put some seashells on it. 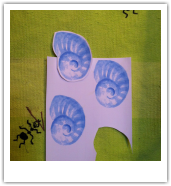 Step 5 Print out your design onto iron on transfer paper. Make sure you mirror your mage, otherwise it will be backwards. Then cut out your pictures. 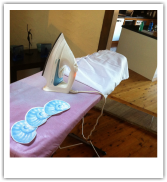 Step 6 Heat up your iron and iron your pillow case. Then place the pictures in the right places for your design. 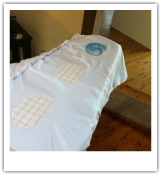 Step 7 After ironing each one for 30 seconds or so, peel off the backing paper and your left with your design. 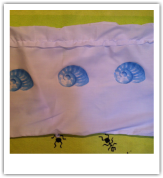 And your done! Now just put your pillow where ever you want! You can do this to make many other pillows for your room.
This is a very easy DIY which can be used to cover any sort of cord. Headphones, chargers, anything you plug into a wall.
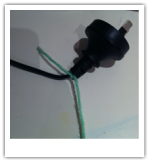 Step 1 Tie a knot on the end of the cord 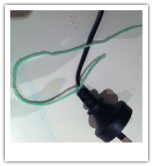 Step 2 Make a four shape with the wool 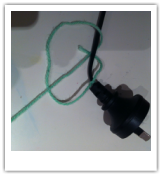 Step 3 Put the end through the loop you just created 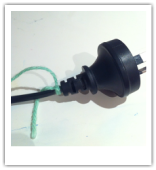 Step 4 Repeat this knot until you finish! 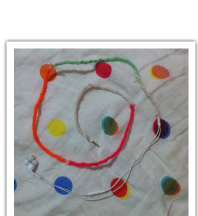 I just wanted to show you guys my headphones ^^that I covered (above). Hope you guys liked this quick DIY to make your chords pretty. This DIY was inspired by a friend of mine. I don't know if she wants her name here, but you know who you are. :)
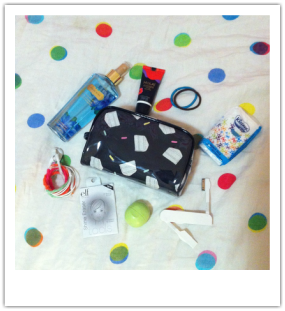 Here are my essentials which I always have in my backpack when I'm at school. 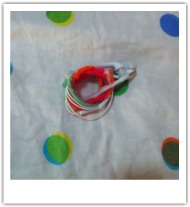 1. Headphones These are pretty self explanatory. I use them when I'm allowed to listen to music in class. I also wrapped them in wool so they wouldn't get tangled.
 3. Portable Charger This is really useful and you can also transfer files as well. It charges iPhone 4/4s, iPhone 5/5s, iPhone6/6+ and some android phones. 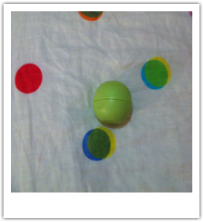 4. Lip balm One of the most essential items you need in your bag. Especially in winter. 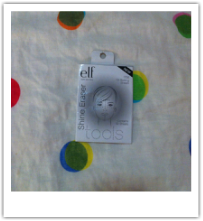 5. Oil blotting sheets Good to use after PE to get rid of shine. 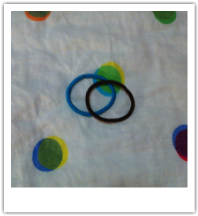 6. Hair Ties When you have PE and you need to put your hair up. 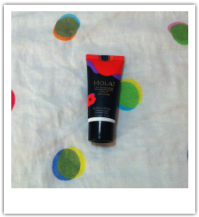 7. Body Lotion When you forget to moisturise your legs in the morning, you can do it at school. 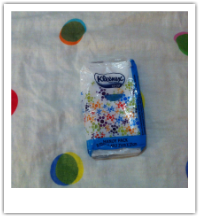 8. Tissues If you have a cold or spill something these will help a lot. Hope this helped you guys! I will post something next week, so if you have any requests, please send them to me. :)
|
AuthorHi it's Elise :) I post every Saturday, so check in then to see new posts. Archives
June 2017
Categories
All
|


 RSS Feed
