|
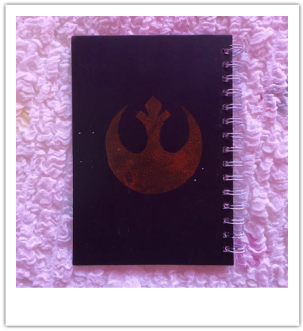
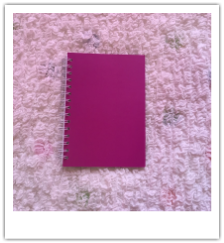
I made this recently for a friends birthday, so I thought I would share with you guys how I made it! What you are going to need- a notebook - black paint - sticker paper which you can print on - a computer and printer - scissors Step 1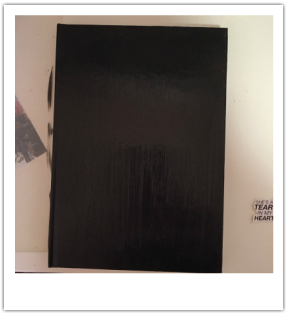 First paint your chosen notebook any colour you want. I chose black because it wouldn't distract the person from the stickers. While you wait for it to dry, you can start the other steps. Step 2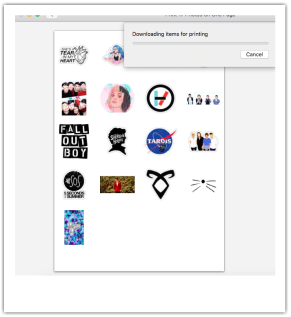 Find photos that you would like to put on your notebook. Since this was for a friend, I chose her favourite tv shows, music and youtubers. Step 3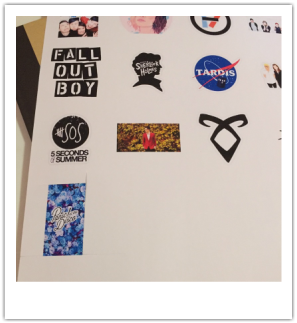 Once you have chosen all your pictures, size them appropriately. I chose to do them as contact size which you select as you print, or you could size each one to however big or small you want. Then print them out onto the sticker paper, following the instructions for your particular sort. Step 4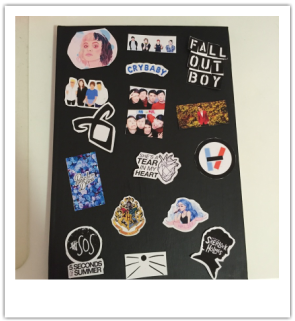 After you have printed them, start cutting out each one. If they are weirdly shaped then use an x-acto knife (if you have one) for more precision. Mine weren't too bad, so I just used scissors. After cutting them out, don't stick them straight onto the notebook. Position each one so you can see if it looks good. Step 5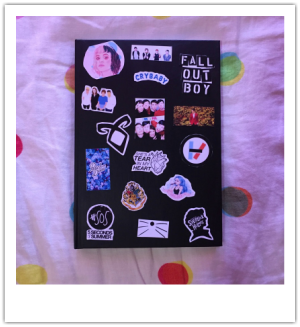 Stick each one down on the notebook and you're done! Hope you guys enjoyed this post! This is a really easy DIY which looks very effective, and it a great gift. You can customise this so it fits the person you are giving it to.
0 Comments
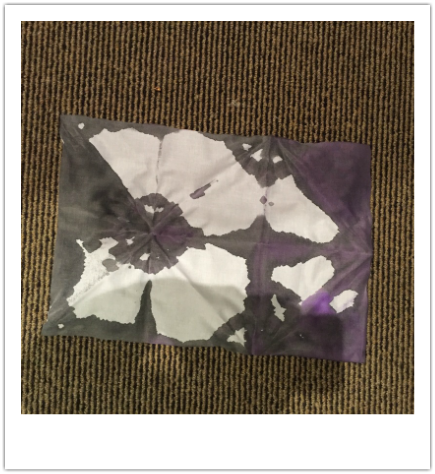 What you're going to need: -White fabric -2 rubber bands -Any colour of dye (I used black and purple) Step 1 Prepare your fabric by ironing out the wrinkles and make sure it is cut to the right length. Step 2 We are now going to start preparing our fabric for dyeing. First fold your fabric in half. Step 3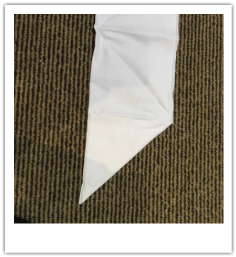 Fold one corner of the fabric down onto the bottom of the fabric. Step 4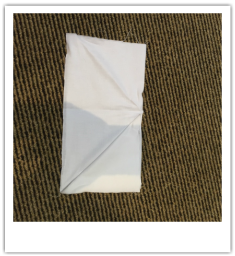 This is the confusing part. First flip your fabric to the other side, so the triangle is folded on the other side. Then create a new triangle on this side, so it looks a bit like a square. Then continue this technique until you get to the end of your fabric. Step 5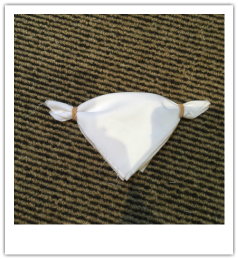 Now all you have to do is secure two rubber bands to the two side corners of your triangle. Step 6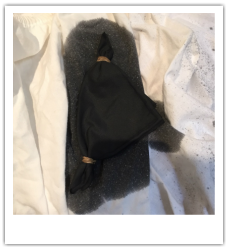 Now all you can actually start dyeing your fabric. So spray on or place your fabric into the dye, whatever suits you. Then leave it to dry for at least one hour before undoing the folds, then you're done! Now that you have dyed your fabric, you can turn it into anything you want! I will be turning mine into a small bag which I will use at the gym. Anyway hope you all enjoyed this post, and if anyone recreates this, then send me pictures of your finished product!
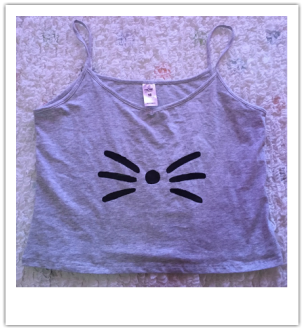
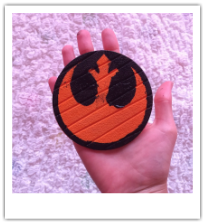
1. How to make a stencilWhat you're going to need -a printer -paper (sticker paper is even better, but normal paper works too) -scissors or an x-acto knife -a computer 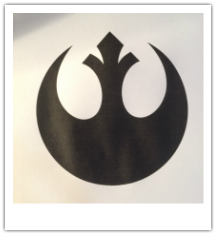 Step 1 Find an image that you want to make into a stencil. I used the star wars resistance sign. Then size it to however big or small you want it. Mine was 9cmx9cm. Then print it out 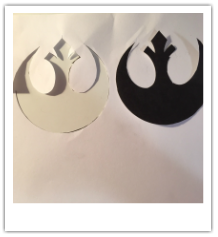 Step 2 Now you are going to cut out the shape. To cut it out start at the side and go inwards to the shape. When you reach an edge, stop and cut around the shape, without cutting any more of the sides. This is a lot easier with and x-acto knife, but it can be done with scissors, as that's what I used. 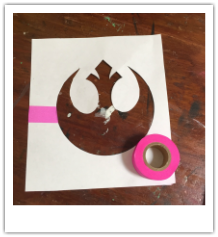 Step 3 Tape up the side you cut into first.This will make your stencil more durable, and easier to paint over. Make sure it's secure and doesn't effect the overall shape. And you're done! Now I will show you what you can use these stencils for. 2. How to use a stencil to decorate a shirt and a notebook
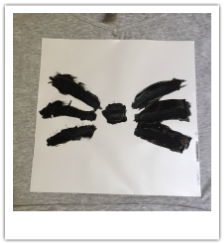
For the stencils, the part you cut out can also be used to create a different sort of design. If your pattern is very hard to cut out and you don't own an x-acto knife, you could do this to get a similar result. I just used the star wars sign, but you could use whatever you want.
Hope you guys enjoyed this post! Making stencils is really easy to do with only limited supplies.
Today is the first day of my back to school series! Even though school still has a few weeks, I just thought I would start now. I will be posting back to school things every Saturday for four weeks. 1. Pencil case As you guys already know, I have done a post on how to make your own pencil case, so I will link that below. 2. Decorated School Supplies. |


 |  This is very easy to do, all you need is washi tape and some pens, pencils, or any school supply you want to cover. Then just wrap the tape around the school supply. This is a good way to decorate your pens, as well as being able to identify them, when someone claims that they own it. |
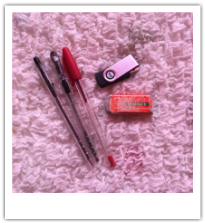
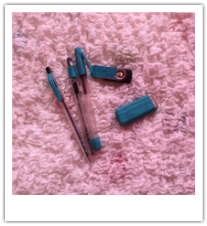
3. DIY Pencil toppers
Before After
 | 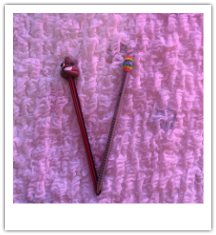 For these you are going to need polymer clay, a pencil and an oven. So first you need to decide what sort of design to do. I chose the poo emoji. Then you want to make the design around the top of the pencil. Then put it in the oven at a low temperature and cook for the amount of time it says on your polymer clay. You might have to cook it longer if you put the oven at a lower temperature. Also I made one where I hot glued some beads onto the top of the pencil. This also looks nice. |
4. Decorated Notebooks
Before After
 | 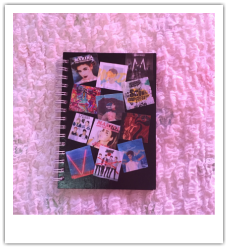 For this you are going to need a notebook, a printer and possibly some paint. First you can paint a base colour for your notebook. I painted mine black. Then you can print out one photo or make a whole collage of photos! I made a collage of all my favourite music. |
5. DIY Keyring
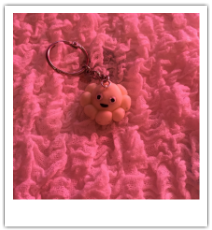
For this DIY you are going to need polymer clay, jump rings, pliers, a keyring and an eye pin. You first want to make whatever you want, I made an octopus. Then put the eye pin in at the top. Then bake it. After that you are going to take your pliers and jump rings and connect a few together, and then one onto the eye pin. Then connect a jump ring to the keyring.
Hope you guys enjoyed this post, because I definitely enjoyed making it.
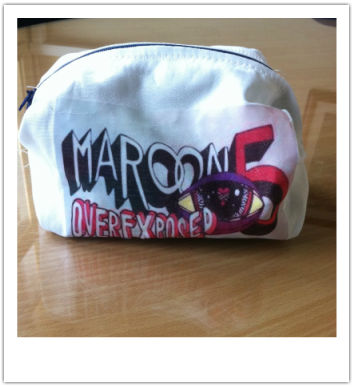
Just want you guys to know that I did not create the pattern for the pencil case, it was made by Anneorshine, but I thought I would share this idea. I thought of the iron on design myself.
What you are gonna need:
-White Fabric
-Iron on Transfer paper
-A printer
- A sewing machine
-A zipper
- Scissors
-An iron
-White Fabric
-Iron on Transfer paper
-A printer
- A sewing machine
-A zipper
- Scissors
-An iron
Step 1
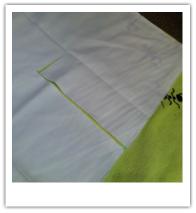
First you want to cut your fabric to size (38.1 cm by 25.4 cm).
First you want to cut your fabric to size (38.1 cm by 25.4 cm).
Step 2
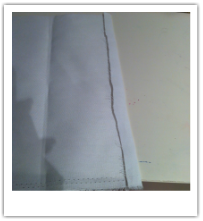
Next you want to fold down the edges of your fabric to create a hem. Use an iron to make sure it stays down.
Next you want to fold down the edges of your fabric to create a hem. Use an iron to make sure it stays down.
Step 3
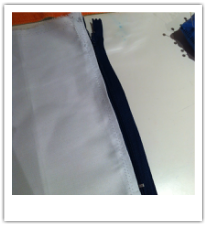
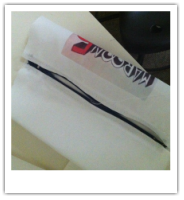
Now you can pin and sew one side onto the zipper. Remember to use the zipper foot on your sewing machine.
Now you can pin and sew one side onto the zipper. Remember to use the zipper foot on your sewing machine.

Step 4
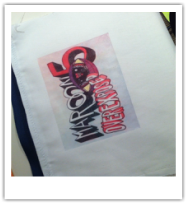
Then you want to print your out your design onto iron on transfer paper. When you print it out make sure it's backwards. Make sure it's the right size to fit your fabric.
Then you want to print your out your design onto iron on transfer paper. When you print it out make sure it's backwards. Make sure it's the right size to fit your fabric.
Step 5
Cut out your design and iron it onto your fabric.
Cut out your design and iron it onto your fabric.
Step 6
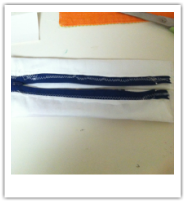
Sew the other side of the fabric to your zipper. When you do this unzip the zipper so it's easier to sew.
Sew the other side of the fabric to your zipper. When you do this unzip the zipper so it's easier to sew.
Step 7
Turn your fabric inside out and fold in the sides. Pin then sew the sides. After this turn your pencil case inside out and your done!
Turn your fabric inside out and fold in the sides. Pin then sew the sides. After this turn your pencil case inside out and your done!
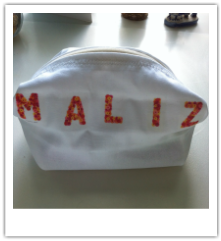
Hope you guys enjoyed this DIY! I really enjoyed making this and I am very proud of it. You can Also use any sort of design you want, like below I have a pencil case I made for my Grandma.
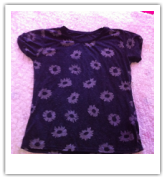 | 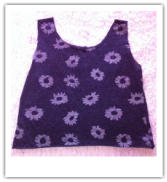 |
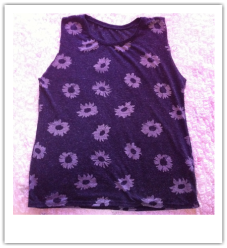
Step 1: Cut off the sleeves
This will turn your shirt into a singlet.
This will turn your shirt into a singlet.
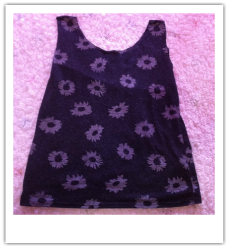
Step 2: Cut off the collar
This will make the straps thinner, which will look better.
This will make the straps thinner, which will look better.
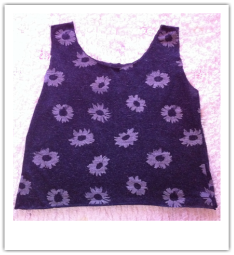
Step 3: Cut off a bit from the bottom
Here you can customise how short or long you want your shirt to be. After this hem the edges.
Here you can customise how short or long you want your shirt to be. After this hem the edges.
And now your done! This is a very simple DIY which can be done to any shirt you want. You can also make your design more advanced by making the straps into braids, by cutting the straps into three and braiding them together, but I decided to leave mine as it is.
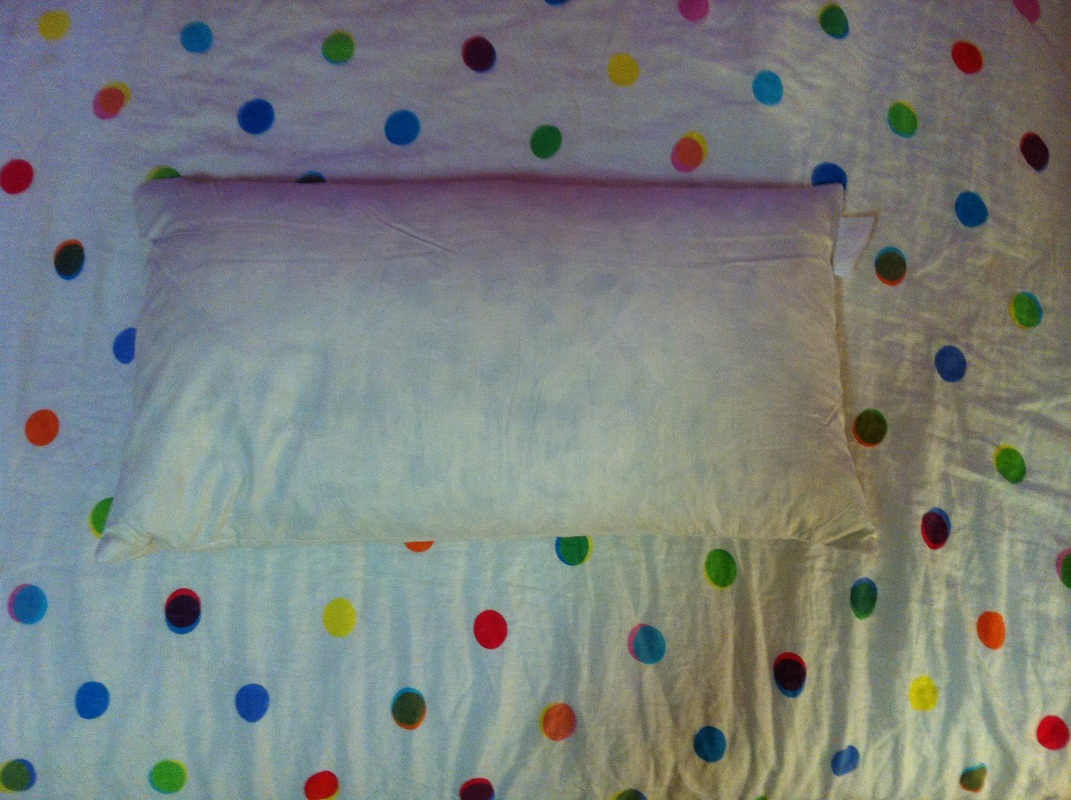
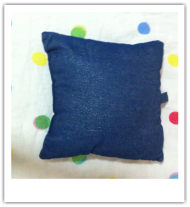 Today i'm going to show you guys how to make this cool pillow with just a few things. What you're gonna need: -A white pillow case ( I showed you guys how to make one of these on my other DIY pillow case post) -Yellow fabric paint -Cardboard -A glue stick -A pen -A sponge | 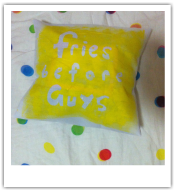 |
Step 1
Make your pillow case or buy one. I showed how to make one on another post.
Make your pillow case or buy one. I showed how to make one on another post.
Step 2
Put some cardboard inside your pillow to make sure the paint doesn't go through.
Put some cardboard inside your pillow to make sure the paint doesn't go through.
Step 3
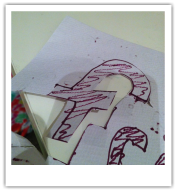
Draw your letters on the cardboard and cut them out.
Draw your letters on the cardboard and cut them out.
Step 4
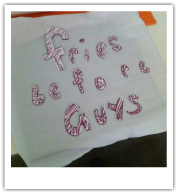
Glue the letters in the places you want on your pillow.
Glue the letters in the places you want on your pillow.
Step 5
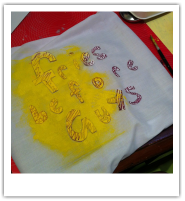
Sponge on your desired colour ( I chose yellow) and make sure all the letters have been covered.
Sponge on your desired colour ( I chose yellow) and make sure all the letters have been covered.
Step 6
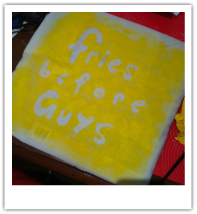
Peel off the letters to reveal your design.
Peel off the letters to reveal your design.
After you do this, wait for the paint to dry and then put it on the pillow. Hope you guys liked this DIY and request any you want me to do in the future.
 | 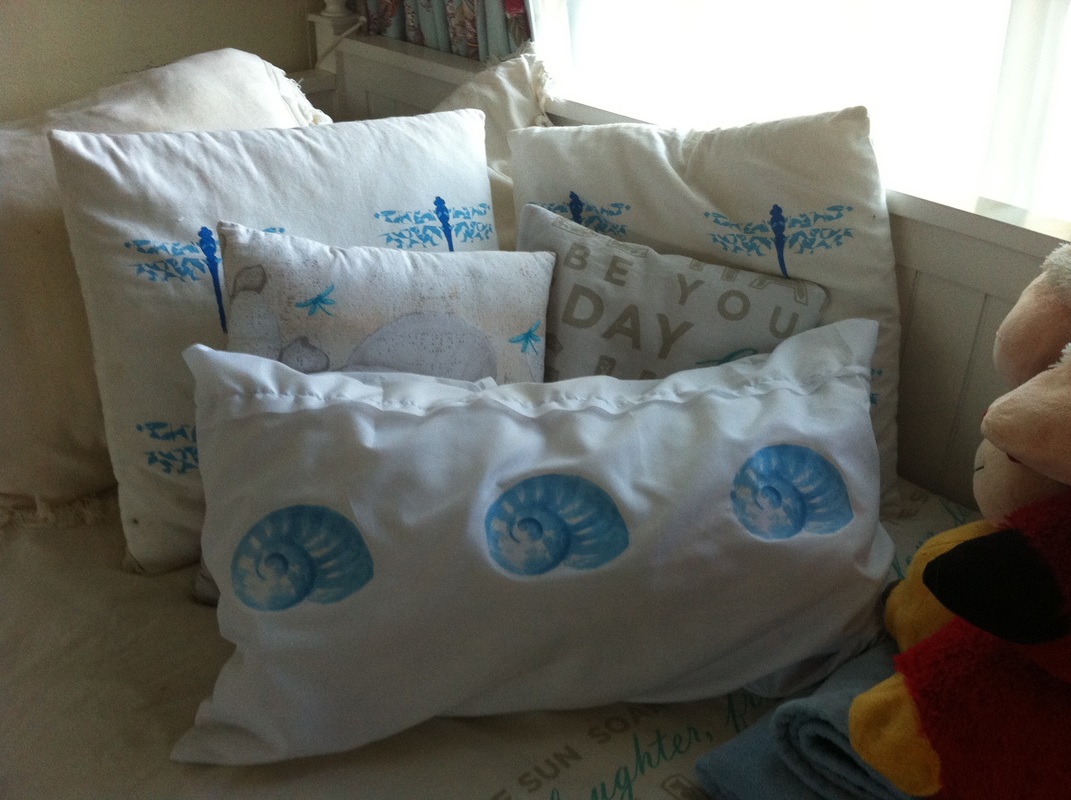 |
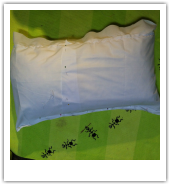
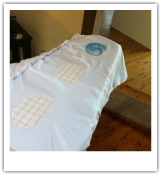
Hey guys today I am going to teach you how to make a DIY shell pillow case.
The things you will need are:
-Fabric
-A Sewing Machine
-Thread
-Iron on transfer paper
-A Printer
-Scissors
-Measuring Tape
-Pins
-A pillow
Step 1
Measure your pillow. Mine was 14 " by 26". Then double the length. To make sure it doesn't get too small when you sew it add 2 inches to the width and 8 inches to the length.
Measure your pillow. Mine was 14 " by 26". Then double the length. To make sure it doesn't get too small when you sew it add 2 inches to the width and 8 inches to the length.
Step 2
Cut it out and make sure it's straight
Cut it out and make sure it's straight
Step 3
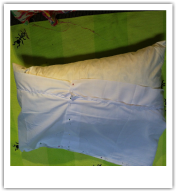
Put your pillow on top of the fabric and fold into the middle. Then pin down the middle.
Put your pillow on top of the fabric and fold into the middle. Then pin down the middle.
Step 4
Take the pillow out and pin both sides. Take out the pins down the middle. Then sew the sides.
Take the pillow out and pin both sides. Take out the pins down the middle. Then sew the sides.
You can leave your pillow like this but I decided to put some seashells on it.
Step 5
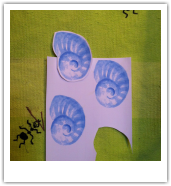
Print out your design onto iron on transfer paper. Make sure you mirror your mage, otherwise it will be backwards. Then cut out your pictures.
Print out your design onto iron on transfer paper. Make sure you mirror your mage, otherwise it will be backwards. Then cut out your pictures.
Step 6
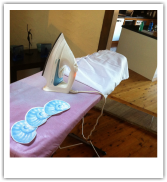
Heat up your iron and iron your pillow case. Then place the pictures in the right places for your design.
Heat up your iron and iron your pillow case. Then place the pictures in the right places for your design.
Step 7
After ironing each one for 30 seconds or so, peel off the backing paper and your left with your design.
After ironing each one for 30 seconds or so, peel off the backing paper and your left with your design.
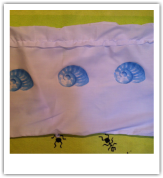
And your done! Now just put your pillow where ever you want! You can do this to make many other pillows for your room.
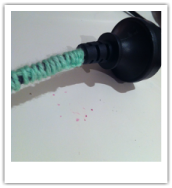
This is a very easy DIY which can be used to cover any sort of cord. Headphones, chargers, anything you plug into a wall.
 |  |
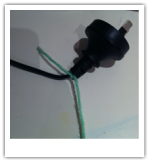
Step 1
Tie a knot on the end of the cord
Tie a knot on the end of the cord
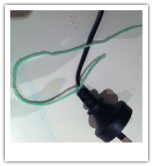
Step 2
Make a four shape with the wool
Make a four shape with the wool
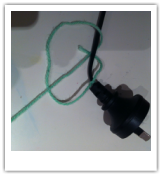
Step 3
Put the end through the loop you just created
Put the end through the loop you just created
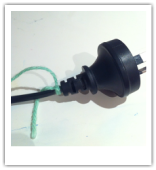
Step 4
Repeat this knot until you finish!
Repeat this knot until you finish!
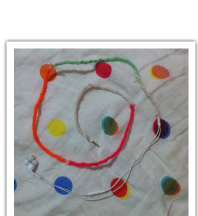
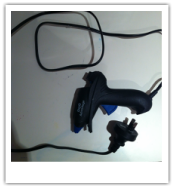
I just wanted to show you guys my headphones ^^that I covered (above). Hope you guys liked this quick DIY to make your chords pretty. This DIY was inspired by a friend of mine. I don't know if she wants her name here, but you know who you are. :)
Author
Hi it's Elise :) I post every Saturday, so check in then to see new posts.
Archives
June 2017
September 2016
August 2016
July 2016
June 2016
May 2016
April 2016
March 2016
February 2016
January 2016
December 2015
November 2015
October 2015
September 2015
Categories
All
Back To School
BellaBox Reviews
Christmas
Design
DIY'S
Easter
Fashion/Lookbooks
Favourites
Food
Game Reviews
Hair Tutorials
Haul
Makeup Tutorials
Organisation
Room Decor
Technology
Travel
 RSS Feed
